
Bike Tire Pressure Calculator
The right tyre pressure makes a bike faster, more comfortable and less prone to punctures. Enter your tyre width, total weight, tyre setup and riding surface, and the calculator suggests a starting front and rear pressure within typical ranges for that tyre size — then fine-tune by feel. It always keeps within the limits you enter for your tyre and rim.
- Free to use
- No sign-up
- Runs in your browser
Tyre pressure calculator
Bike Maintenance Printables
Printable bike maintenance kit: tyre pressure chart, pre-ride ABC checklist, a maintenance log workbook and a flat-repair step card.
- Pressure chart (PDF)
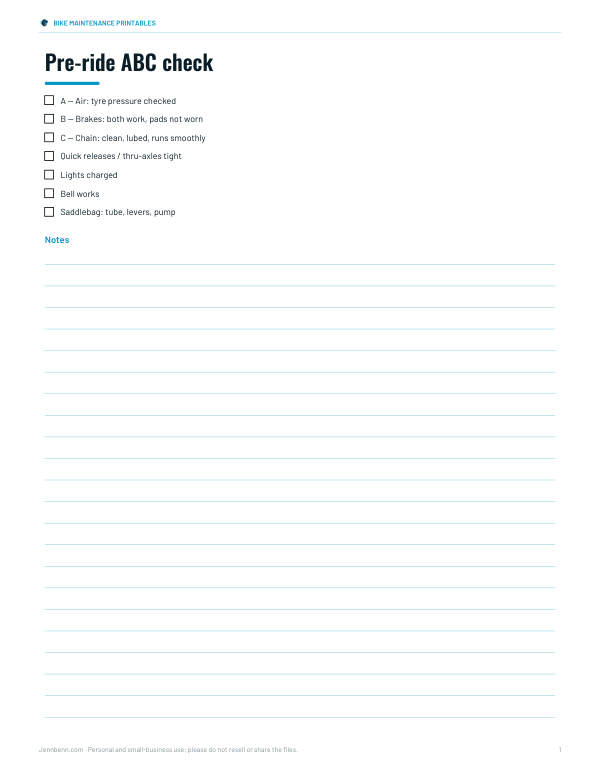
- Pre-ride check (PDF, DOCX)
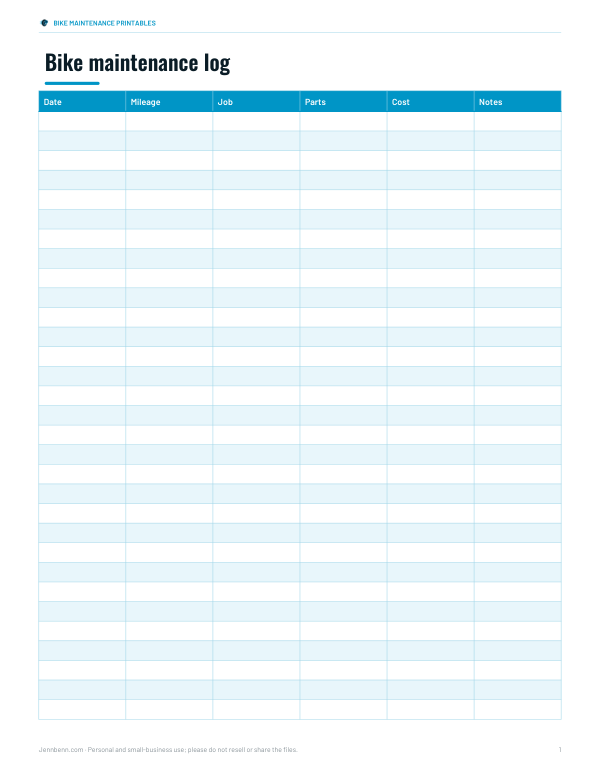
- Maintenance log (XLSX)
- Flat repair (PDF)
Formats: PDF, DOCX, XLSX. Instant download after payment (link valid 72 hours, up to 5 downloads). AI-assisted: the templates were drafted with AI help and reviewed and laid out before publishing.
$3.00 USD, one-time 4 files · about $0.75 each
- Instant download
- 7-day refund
- Secure checkout by Stripe
7-day money-back guarantee. Full refund within 7 days of purchase, even after you download.
Free sample: Bike Maintenance Log (PDF, 69 KB)
Full refund within 7 days — see the refund policy and license.
Free printables
Single sheets you can print right now, no sign-up. The full pack adds every sheet in one download plus the editable files.
 Printable Bike Flat Repair Sheet
Why lower isn’t slower
For years riders pumped tyres as hard as possible, but on real roads very high pressure makes the bike bounce over small bumps, wasting energy and reducing grip. Studies of rolling resistance on rough surfaces have found that moderate pressures, which let the tyre absorb vibration, are often as fast or faster than maximum pressure. Too low, though, and the tyre squirms in corners, risks pinch flats with tubes and can damage rims. The aim is the lowest pressure that still supports you securely.
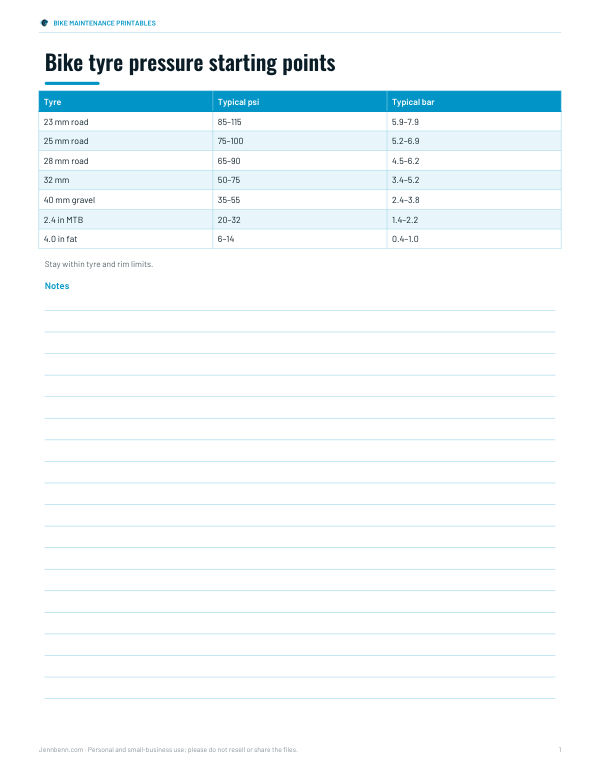
Typical pressure ranges by tyre width
| Tyre | Typical range (psi) | Typical range (bar) |
|---|---|---|
| 23 mm road | 85–115 | 5.9–7.9 |
| 25 mm road | 75–100 | 5.2–6.9 |
| 28 mm road | 65–90 | 4.5–6.2 |
| 32 mm road/gravel | 50–75 | 3.4–5.2 |
| 35 mm hybrid | 45–65 | 3.1–4.5 |
| 40 mm gravel | 35–55 | 2.4–3.8 |
| 45 mm gravel | 30–48 | 2.1–3.3 |
| 2.0 in MTB | 25–40 | 1.7–2.8 |
| 2.4 in MTB | 20–32 | 1.4–2.2 |
| 2.6 in MTB | 17–28 | 1.2–1.9 |
| 4.0 in fat bike | 6–14 | 0.4–1.0 |
Ranges are general guidance compiled from common manufacturer recommendations; your tyre may list its own range. Lighter riders sit towards the lower end and heavier riders towards the upper end.
How the calculator works
- It starts from a typical range for your tyre width.
- It places you in that range according to rider and bike weight (about 60 kg at the bottom, 110 kg at the top).
- It lowers pressure for rougher surfaces and by about 8% for tubeless tyres, which can run lower without pinch flats.
- The front is set about 7% lower than the rear, because the rear carries more weight.
- It caps both at the maximum you enter for your tyre or rim.
Worked example
A 75 kg rider on a 9 kg road bike with 28 mm tyres and inner tubes, riding smooth tarmac, gets a suggestion of about 77 psi rear and 72 psi front (5.3 and 4.9 bar). Switching to tubeless drops that to about 71 and 66 psi; choosing rough roads lowers it a few psi more. With hookless rims limited to 72.5 psi, the calculator would cap the rear at that limit.
Fine-tuning by feel
- If the bike feels harsh and skips over bumps, drop 3–5 psi.
- If the tyre feels vague in corners or you bottom out on the rim, add 3–5 psi.
- Mountain bikers often adjust in 1–2 psi steps.
- Check pressure before every ride — tyres lose air, especially latex tubes and tubeless tyres.
- Use a floor pump with a gauge, or a digital gauge for accuracy.
Tubes, tubeless and pinch flats
A pinch flat (“snakebite”) happens when the tyre compresses so far that the tube is pinched against the rim, leaving two small holes. Tubeless tyres have no tube to pinch, so they can run lower pressures, improving grip and comfort — especially on gravel and trails. Tyre inserts in mountain bike tyres allow even lower pressures by protecting the rim.
Checking pressure with a gauge
- Check pressure with tyres cold, before riding.
- Note your valve type: Presta (thin, with a lock nut) or Schrader (like a car valve).
- For Presta, unscrew the tip and press it briefly to free it.
- Attach the pump head firmly and read the gauge.
- Pump to the target, remove the head straight off and close the valve.
Floor-pump gauges can be off by several psi. If you want consistent pressures, use the same gauge each time or check it against a digital gauge.
Road, gravel and MTB differences
Road riders on narrow tyres use higher pressures because the tyre has little air volume to support the load. Gravel riders run lower pressures to grip loose surfaces and absorb bumps, and many choose tubeless to avoid pinch flats. Mountain bikers use the lowest pressures of all, often adjusting by just one or two psi, because grip on roots and rocks matters more than speed on smooth ground. Heavier riders, loaded touring bikes and e-bikes all need more pressure than a light rider on a light bike with the same tyres.
Safety limits
Every tyre has a maximum pressure printed on its sidewall, and many rims have their own limits. Hookless rims in particular are usually limited to about 5 bar (72.5 psi) and require compatible tyres. Never exceed the lower of the tyre and rim limits, and check for a minimum pressure on the tyre too.
Privacy
The calculator runs in your browser; nothing is uploaded.
Frequently asked questions
What tyre pressure should I run on a road bike?
For 28 mm tyres, often around 65–90 psi depending on weight; wider tyres need less.
Should the front tyre have less pressure than the rear?
Usually slightly less — about 5–10% — because it carries less weight.
What pressure for gravel tyres?
Often 30–55 psi for 40–45 mm tyres, lower if tubeless.
What pressure for mountain bike tyres?
Commonly about 20–32 psi for 2.3–2.4 inch tyres.
Can I run lower pressure tubeless?
Yes, usually about 5–10% lower because there is no tube to pinch.
Should I adjust for wet roads?
Many riders drop pressure a few psi in the wet for more grip.
How do I convert psi to bar?
Divide psi by 14.5.